Home Office Before and After
What actually changes visually, and how to see it on your own photo first. Built-in desk, real storage, and a wall you can be seen against.
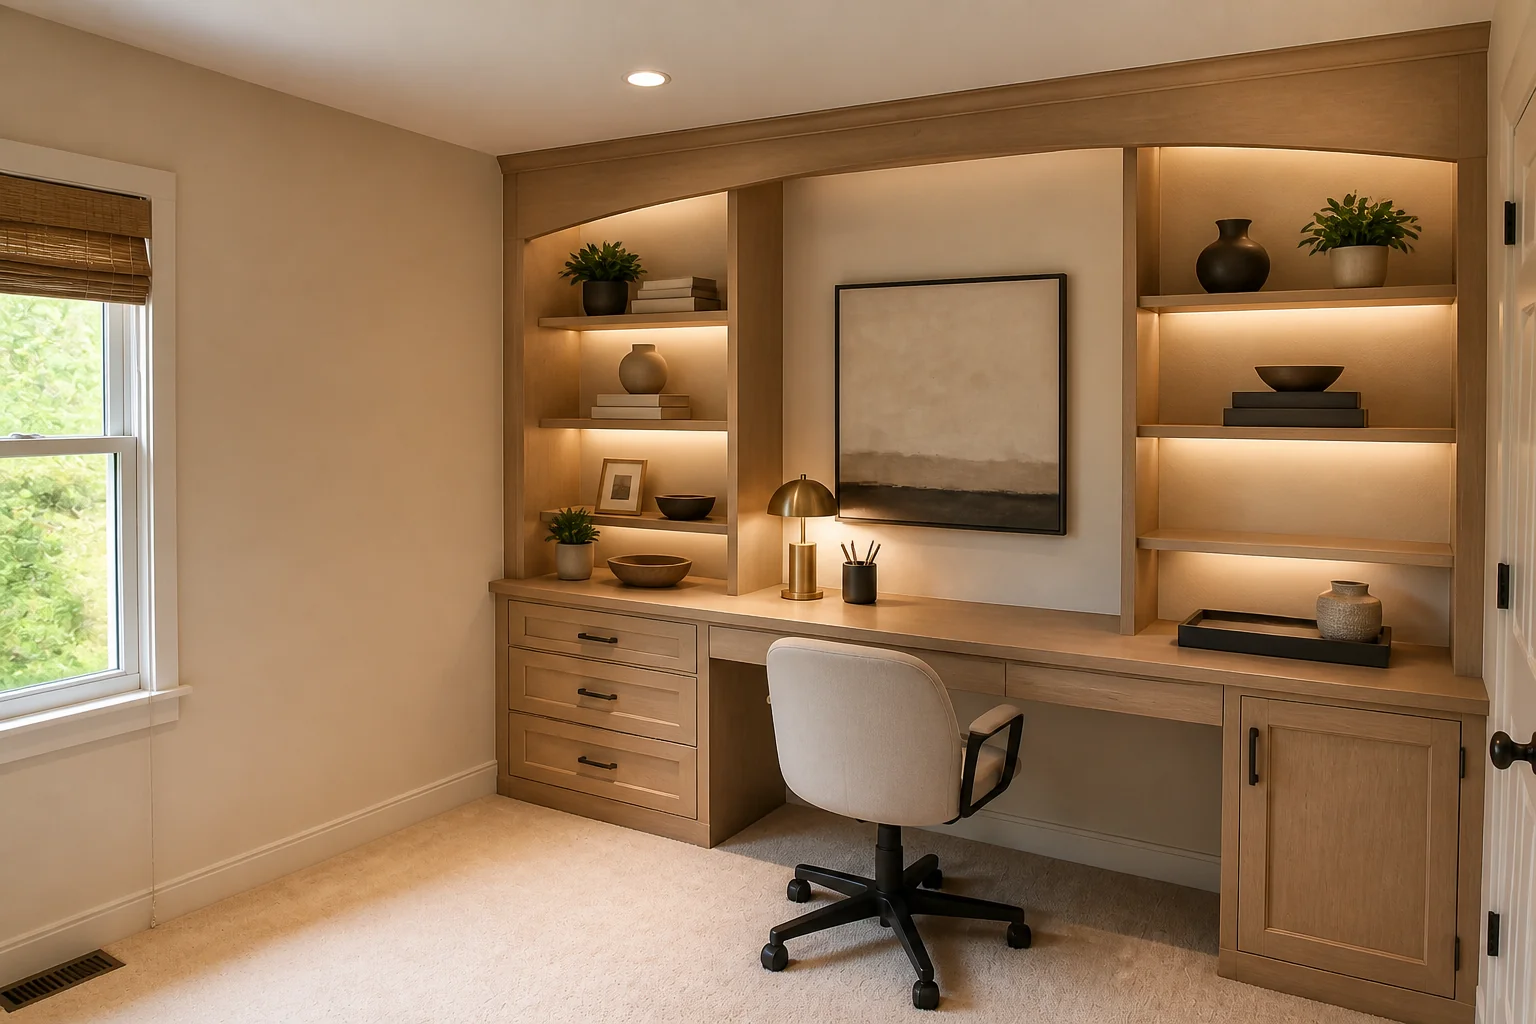 BeforeAfter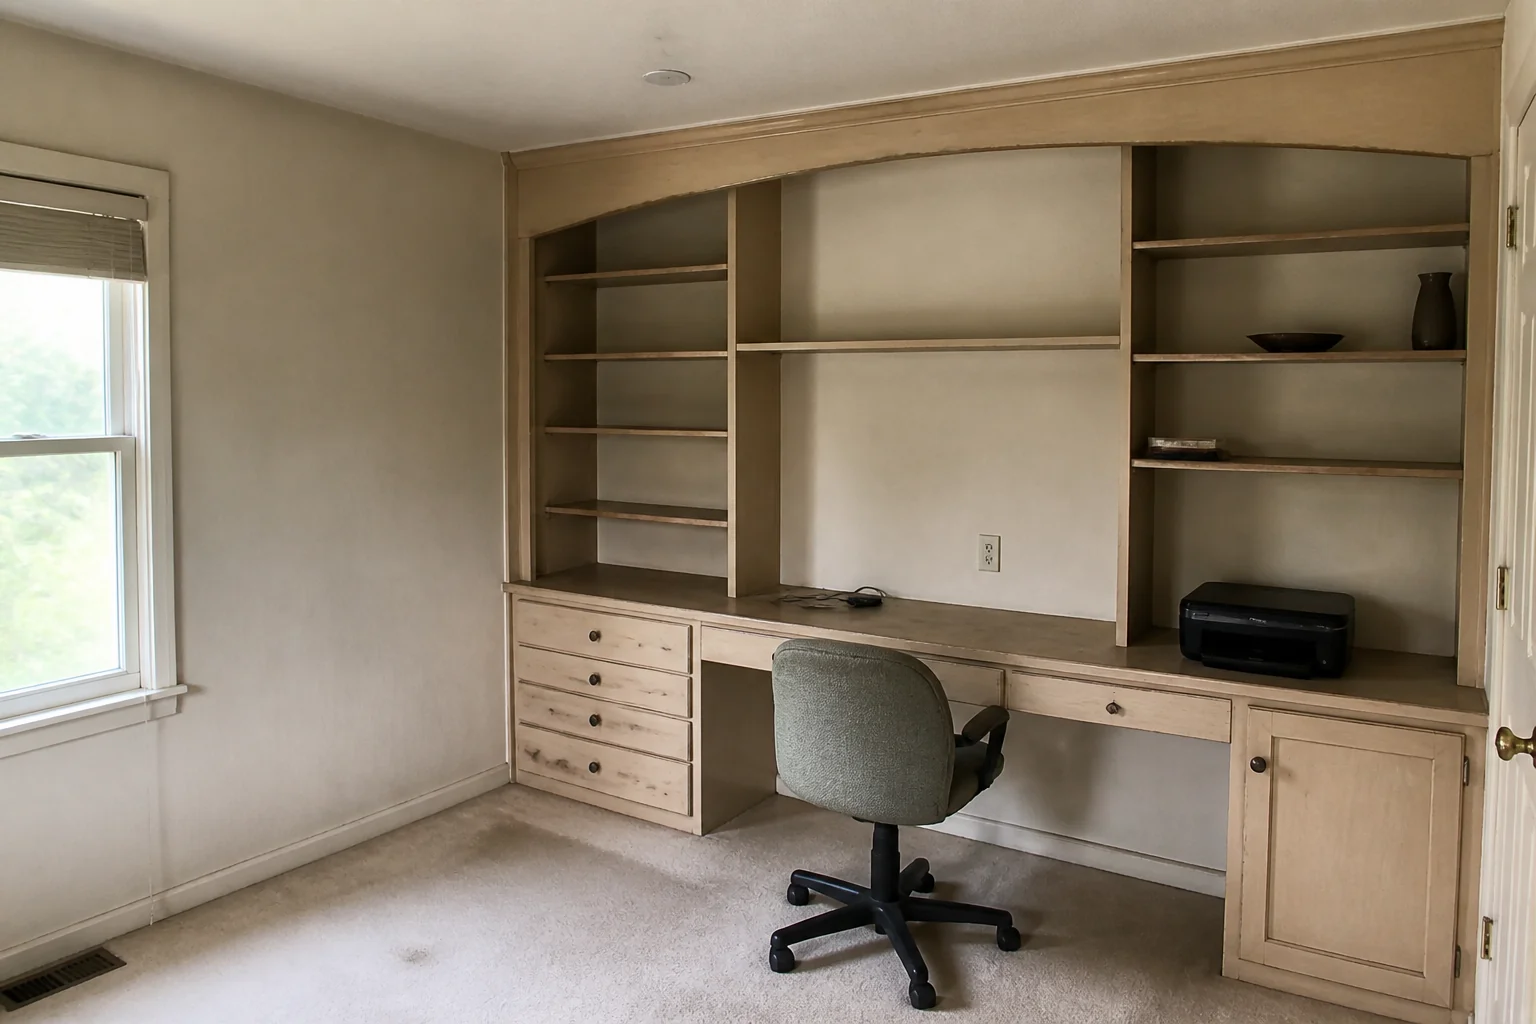
- 1
What visibly changes
A home office remodel is joinery plus a lighting plan. The desk becomes part of the wall, the storage goes vertical, and — since half the room's job is now being a background — the wall behind the chair gets as much thought as the one in front of it.
- 2
The elements doing the work
Across a set of before-and-afters the same items carry the difference: built-in desk and returns, shelving to ceiling, cable management, task and background lighting, acoustic treatment. Everything else is detail on top of those.
- 3
See it on your own room first
Upload a photo and the Studio renders the finished version from it. A Standard run is 4 credits and new accounts start with 4, so there is a full before-and-after before anything is paid for.
Questions
- What should I decide first in a home office remodel?
- A home office remodel is joinery plus a lighting plan. The desk becomes part of the wall, the storage goes vertical, and — since half the room's job is now being a background — the wall behind the chair gets as much thought as the one in front of it.
- What goes wrong most often?
- The desk facing a window, so the camera exposes for the light and the face goes dark. Shelving stopped at picture height, wasting the most useful storage in the room.
- Will it work in a small home office?
- In an alcove under 6ft wide, run the desk the full width and take the shelving to the ceiling above it. A freestanding desk in a small office wastes the two inches at each end that make it feel built-in.
- Can I see it on my own home office before starting?
- Yes — photograph the space and run it through the Studio. It is generated imagery, so compare the render against your photo rather than treating it as a plan.